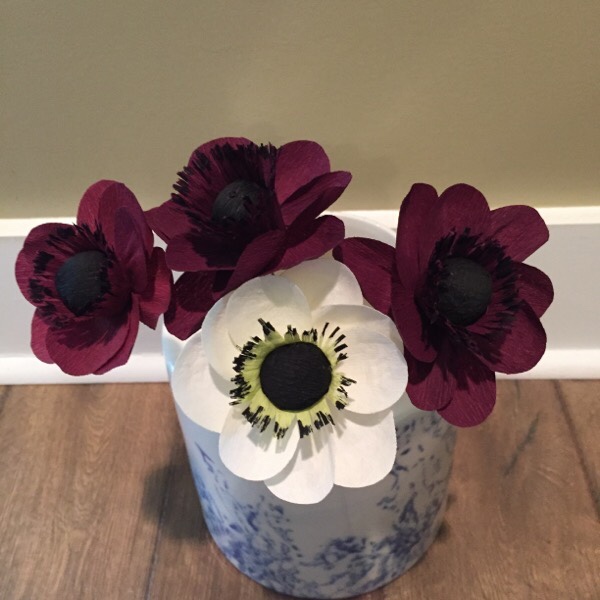
The Anemone is a simple flower to begin with using some basic crepe paper flower making techniques.
A list of items for this project:
Crepe paper, your choice of color and weight, crepe paper in pale green and medium leaf green, crepe paper in black, sharp scissors, pliers, 18 gauge floral wire, medium green floral tape, tacky glue, black sharpie, toilet paper. (Ah, got your attention with that one) and the Crepe Paper Anemone template and supply list you can download for free here.
You can find any of these items by clicking the links to Amazon as well as likely finding them in your local craft store.
Using the crepe paper color you chose for the petals:
Cut 3-5 small petals
Cut 3 medium petals
Cut 3 large petals
Out of pale green: Cut one strip 1 x 8 inches
Out of medium leaf green: Cut 4 leaves and 2 strips of 1/3 x 8 inches
Cut 1 oval out of black crepe
Use pliers to create a 1/4 inch loop at one end of the wire. Use 4 squares of 1 ply toilet tissue and fold lengthwise in half and then the remainder in thirds. You can secure folds using small amounts of tacky glue to keep the folds from opening. If using thicker toilet tissue you may only need 2 squares. Adding glue to the loop you made in the wire, begin wrapping the folded toilet tissue around the loop and secure with glue as you go. Take another 2 squares of 1 ply tissue and fold over until half the width of your first piece. Secure with glue and wrap around center of the first tissue as if it were the “belt”. This is creating the “bulb” shape for the center of your anemone flower.
Stretch the black oval of crepe and cover your “bulb” beginning on the top, securing with tacky glue. Pretend you are re-wrapping a dum dum sucker or a Tootsie Pop. Twist the remainder of the black crepe tightly around the base of the bulb. Secure loose crepe with glue.
Wrap floral tape around the floral wire all the way to the bottom. Do this by gently stretching the tape with a downward pull and the tape will grip the wire because it is slightly sticky. Place a thin line of tacky glue down the length of the taped wire. Use one of the 1/3 inch medium green crepe strips and cover the floral tape in the same manner all the way to the bottom.
Create the stamen for the flower. Take the 1 inch tall pale green crepe strip and outstretch to the fullest. Using black sharpie, color the top 1/8 in of one edge of entire strip. Cut strip with sharp scissors, fringing from the edge marked with the sharpie.
Keeping the sharpie colored side of the pale green strip to the inside, wrap the strip around the base of the bulb, slightly underneath, securing with glue only on the bottom edge of the strip, occasionally as you go, until the full length is wrapped around.
Shape each petal by placing both thumbs in the center bottom and gently stretching. Also gently stretch the top section in the middle only. Use your thumb and pointer finger to gently curl about an 1/8 of an inch of the edges of each petal outward.
Place tacky glue at the inside base of your petal and attach under the bulb covering the bottom of the pale green strip, placing petals where they are pleasing to you. You may pull up a google image of an anemone flower for petal placement suggestions. Also use images to determine how many of the petals you want to use. This type of flower has varying numbers of petals. So the end composition is up to you.
I typically use between 6-10 per flower.
Outstretch the base of your green leaves. With glue, attach directly under the petals with a small amount of the bottom of the leaf covering the floral wire. You can use 2 or 3 to cover the underneath as your sepal. I use two. Whatever is pleasing to you.
Take your last leaf and wrap around the stem approx. 1/3 to 1/2 way down the stem from the top and secure with glue.
Using the other 1/3 in strip of pale green crepe, secure at the top of stem, covering any loose crepe first and then wrapping around the stem until you get to the top of the leaf you placed mid stem. Tear off and secure with glue. Continue with the leftover strip by securing and covering the base of the midway leaf and continuing down the stem to the bottom.
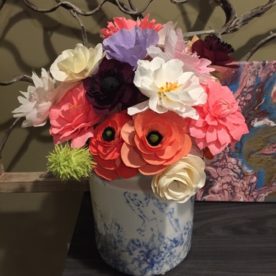
Hold your beautiful handmade, lifelike flower and ADMIRE YOUR CREATIVITY! Bravo!